Who really needs a 3000# winch on their ATV? Most winch
manufacturers recommend a pulling capacity at least 1.5 times gross
vehicle weight so using the 5 to 1 factor this winch provides I
would need a 40,000# winch on my crew cab pickup, that's cool.
Seriously to fully use the winch you need to anchor your ATV to
something solid, but this abundance of power should make even the
most difficult extractions a piece of cake. I choose the Ramsey
winch because of my good experiences using their full size winches
on a couple of outings with friends who needed that 40,000# winch I
mentioned earlier. The remote control is a handy feature in that in
extremely awkward or off camber winching activities you only need
to be within range of the transmitter, about 25 feet when I was
testing after the install. This will put you safely out of the way
when the unexpected happens. So follow along as I begin the
installation. Believe it or not it really does help to read the
instructions before you start. I did, but, the most helpful part
was the wiring diagram which picked up where the instructions left
off. Here we go…..
 |
 |
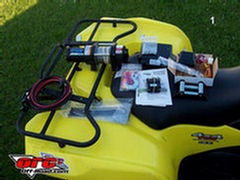
| I started the installation by laying out all of the pieces.
This allows you to ensure you've got everything and get a feel for
how it all goes together. |
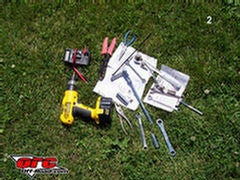
You will need a selection of hand tools and drill bits to
complete the installation. The only item I used that isn't shown
here is automotive Goop. I'll explain that later. |
 |
 |
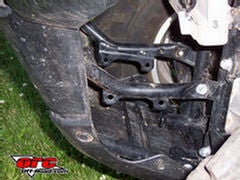
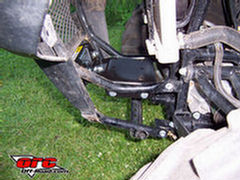
| Suzuki thought ahead and provided winch mount points for the
base plate. My only complaint is that they are of light guage
material and welded to thin wall frame tubes. I don't believe these
attachment points would hold up to heavy pulls over time. |
The winch mount itself is of sturdier stuff. Formed of
3/16” plate and powder coated black, it should hold up to
years of use/abuse. The winch itself comes with a roller fairlead,
which is a nice touch when most only come with a hawse type. Ramsey
also makes available an aluminum hawse fairlead for use with
synthetic line, which has the advantage of not recoiling and
separating you from your appendages if it should happen to
break. |
 |
 |
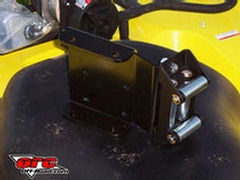
| As you can see I've got the winch mount and fairlead installed
in the frame using the supplied hardware. We purchased an
aftermarket mount from eWinch.com intended for use with this model
winch and it is a precise fit. I tried to limit the number of body
panels removed, but I ended up removing everything that wasn't
yellow by the time I got done, so I would recommend starting out by
doing just that. |
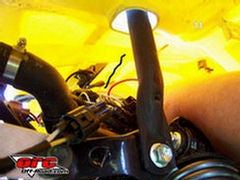
The best place I could find to install the solenoid was right
here behind the front bumper fascia. It's in the airflow but not
exposed and with the tightly packed drive train, was the only place
I could find to make it fit and still have the leads all reach
where they need to go. |
 |
 |
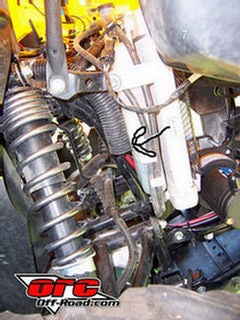
| Suzuki provides this handy piece of flexible conduit to run the
power leads for the solenoid through. At least that's what I used
it for. It worked great and keeps them out of harms way. |
The plastic conduit terminates where the red and black leads
run up in front of the battery tray. Quick, Simple and Easy. |
 |
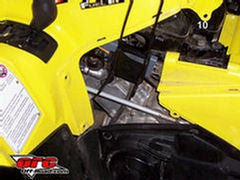 |
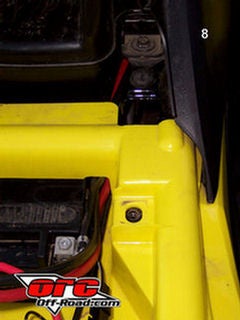
| In addition to the remote control for your key ring, Ramsey
included a 2-position toggle switch for those times when your
remotes batteries go dead. Usually when needed most! The toggle
switch is installed on the left side of the headlight pod, between
it and the gear selector lever. This location was the best
combination of accessibility and protection from branches and front
rack loads. |
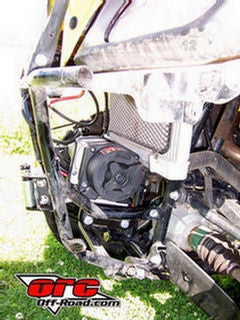
Shown here is the receiver. With the tightly packed drive train
under the left side engine cover provided the best access and
protection. I formed up the grey mount out of some 14 gage steel
and sandwiched it between the frame and a torque mount that limits
the engines twist. It's a tight fit the side cover just clears the
receiver by a quarter inch of so. |
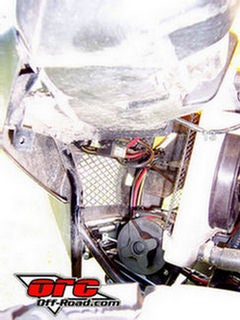
 The antenna
is mounted up under the front plastic just behind a black plastic
grill. This was very difficult for me to get my fat fingers into
and I thought very well protected. The antenna mounts using double
backed sticky tape. The antenna mount is the only part of the kit I
found to be cheap. The directions tell you to wipe the proposed
area for antenna installation down with rubbing alcohol then stick
the three part antenna into place. I did just as instructed. The
antenna stayed in place for about 5 miles then fell off. I
reattached it with Automotive Goop and a zip tie through the small
grill and we had no more problems. The antenna
is mounted up under the front plastic just behind a black plastic
grill. This was very difficult for me to get my fat fingers into
and I thought very well protected. The antenna mounts using double
backed sticky tape. The antenna mount is the only part of the kit I
found to be cheap. The directions tell you to wipe the proposed
area for antenna installation down with rubbing alcohol then stick
the three part antenna into place. I did just as instructed. The
antenna stayed in place for about 5 miles then fell off. I
reattached it with Automotive Goop and a zip tie through the small
grill and we had no more problems. |
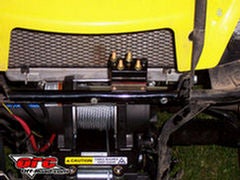
 Notice the
minimal winch-to-radiator clearance. This picture was taken with
the winch and the mount pulled firmly forward before they were
tightened down. It's only about a 1/16 ” To me that's too
tight but the winch never contacted the radiator so its no real
problem so far. Notice the
minimal winch-to-radiator clearance. This picture was taken with
the winch and the mount pulled firmly forward before they were
tightened down. It's only about a 1/16 ” To me that's too
tight but the winch never contacted the radiator so its no real
problem so far. |
 |
 |
| Here you see the front fascia reinstalled and the final routing
of the wiring. (“Fascia” - never thought I'd use that
term while talking about a rough and tough ATV.) |
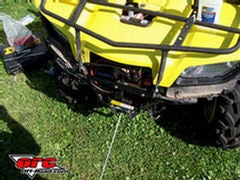
My only shot of the winch in action while spooling the line
tightly on the winch drum to complete the installation. I really
did try to get stuck, but the Suzuki was doing its best to churn
its way through the stickiest mud and steepest climbs I could
find. |
One final thought - pick up a few of Suzuki's
plastic rivets before you even start. I managed to ruin two while
removing the plastic. Good luck with your own winch installation,
and better luck with getting stuck enough to test it! We have since
used this winch to pull large trees out of the trail, though it was
nearly dark and the camera wasn't easily at hand, so you'll have to
take our word for it.
 Your Privacy Choices