Breakdowns and broken parts are about as common as dirt in your face and wind in your hair. In fact, considering the abuse a vehicle often takes, its a wonder that the breakdowns arent more severe.
Previously I have discussed ways to minimize hazards and therefore potential damage to your vehicle. Here Ill show you how to replace a universal joint. U-joint replacement, while not as common as fixing tires or replacing tie rods, is an important skill to know. A broken U-joint will cripple your vehicle; knowing how to handle the situation will get you back on the trail.
There are a variety of U-joints in both the front axle and drive shafts. The front drive shaft U-joints are different from the back drive shaft, and the U-joints at each end of the drive shaft could be different from each other.
Take a moment to review the U-joints found in your vehicle(s). Pack spare U-joints that are appropriate for your front axles and drive shafts. They are cheap insurance and take up little space.
If you have a spare U-joint and thats the only thing thats broken, swap in a good one. If the universal joint damaged the yoke it fits into, take the damaged part out so you can still drive (or tow) the vehicle.
One of the cardinal rules of four wheeling is to be prepared. Remember this: The more remote and the more difficult the trip, the more you need to take! That is when you take a spare drive shaft or axle(s) too.
More Trail Tips Stories
What Causes Washboard Roads?
Checking the Weather Before Heading Off-Road
Off-Road News Years Resolutions You Can Keep
By the way, I occasionally offer a one-day field repair class. I discuss U-joint replacement and other topics. Contact me if youre interested in learning more below.
Replacing a Universal Joint
The tools and parts youll need for replacing a U-joint include:
New U-joint
Snap ring pliers or pliers
Flat blade screw driver to push the "C" clips off - a thin blade is nice
Big hammer
Block of wood to work on
Old socket that has the right OD (outside diameter) to fit inside the yoke holding the U-joint cap
How to Change a U-Joint (Follow the pictures below):
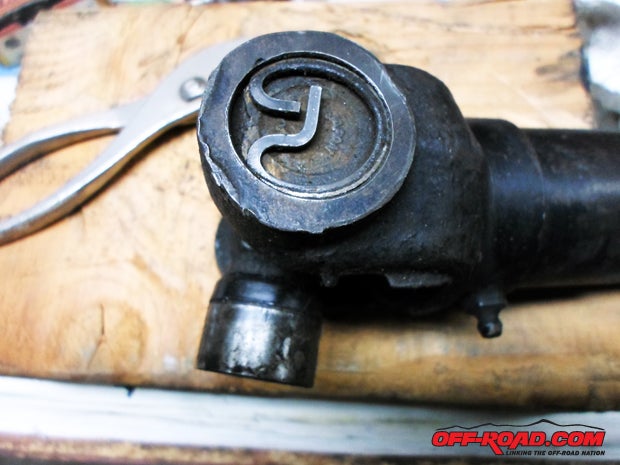
- Remove the axle or drive shaft so you can get to the U joint.
- Remove the snap rings on both ends (some have a C clip on the inside push them off with a screw driver).
- Use an old socket (spark plug socket is about right) to drive the cap in on one side forcing the cap out the other side. This will destroy the socket, which is why I recommend you use an old one.
- Remove the cap that comes out the far side of the yoke.
- If you can, work the other cap off on the inside of the journal. If not, drive it back out its original side.
- When you put the new caps on make sure all the needle bearings are in place and that none have fallen out. If one is lying in the bottom of the cap, you will not be able to get the snap ring back in and will have to start over. Set the other caps aside so they are not damaged or fall off as you hammer the one you are working on.
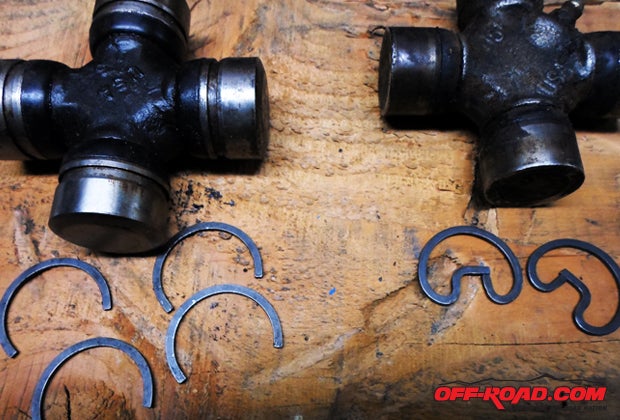
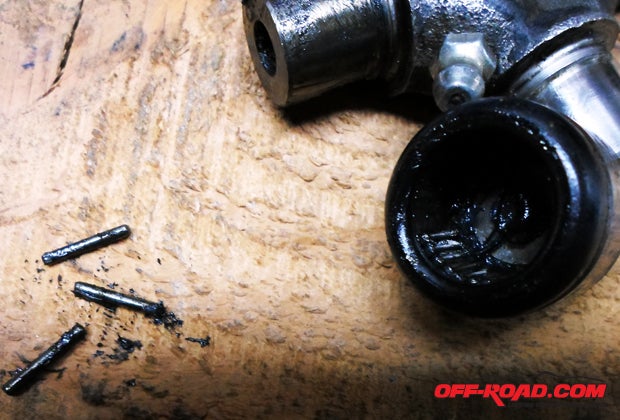
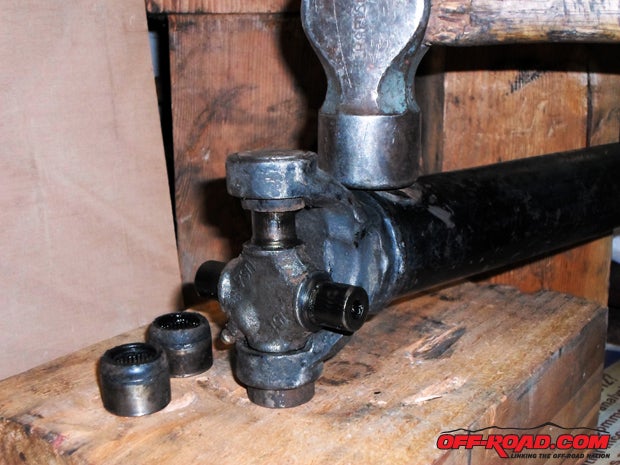
This is what a drive shaft u joint looks like. Only two of the caps have retention clips. The other two ends have U-bolts or straps that hold them to the output shaft of the T-case or the pinion of the axle. If you need to save this U-joint - tape the other two caps to each other so they cannot fall off.
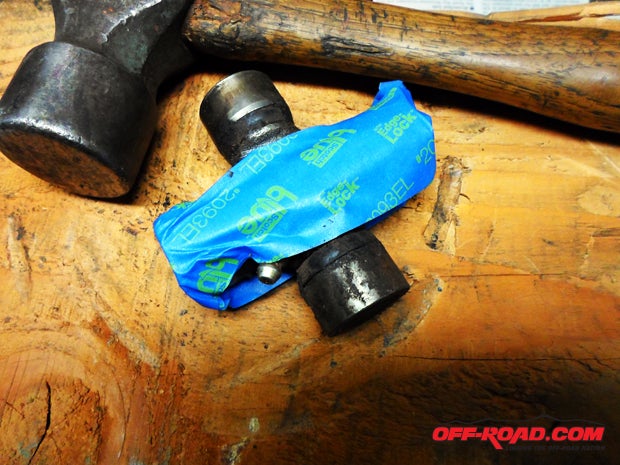
When you unbolt the U-joint from the driveshaft, run a bit of tape - like this - to ensure the two caps not in the yoke do not fall off and spill their needle bearings. In this picture, we have already removed the other two caps from the yoke.
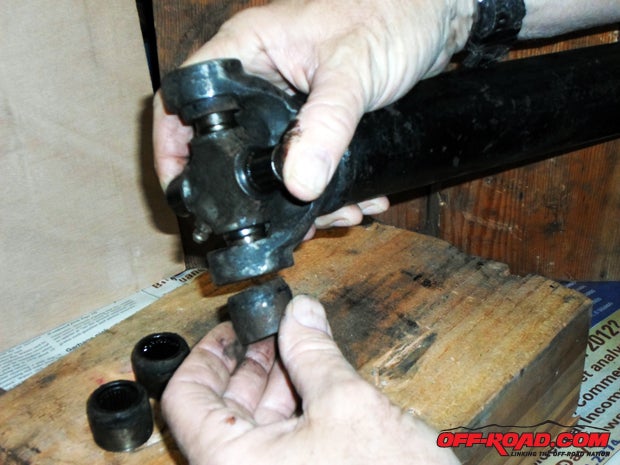
This is what a front axle U-joint looks like. Look carefully and you can see the "C" clips clearly on at least one of the caps.
You don't want to see needle bearings falling out of a cap you need to use / reuse. Our friend "Pappy" meticulously found every one in the dirt one day and put them back in place. There was no other option - we did not have a second spare U-joint.
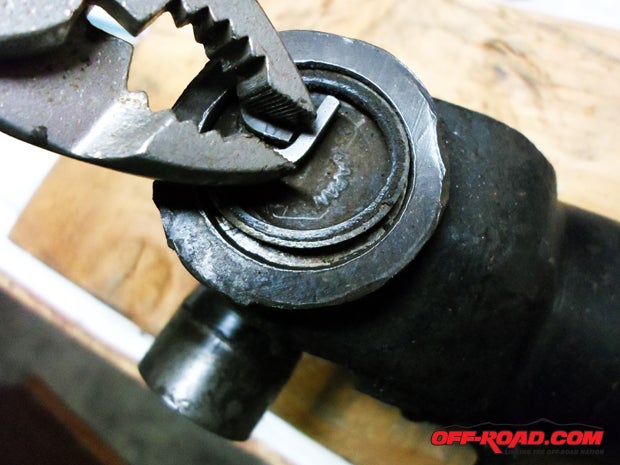
Use pliers to remove the snap ring in this type of U-joint or use a screwdriver to remove the C-clips on the other type of U-joint. Normally you will find fresh snap rings or C-clips in the box with the new U-joint. However, keep track of the old ones. With limited resources, you may just find you need it if one goes flying off never to be found!
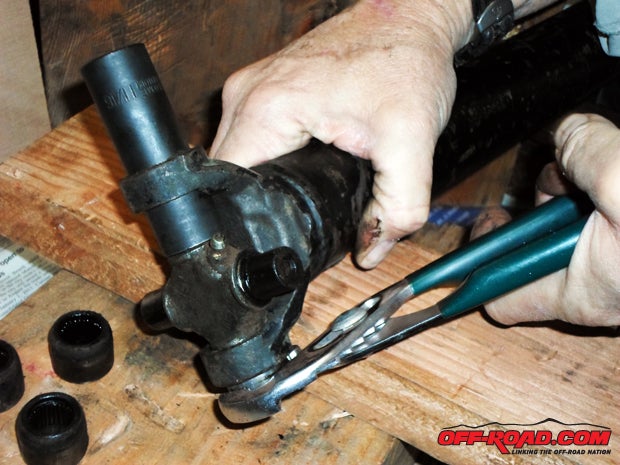
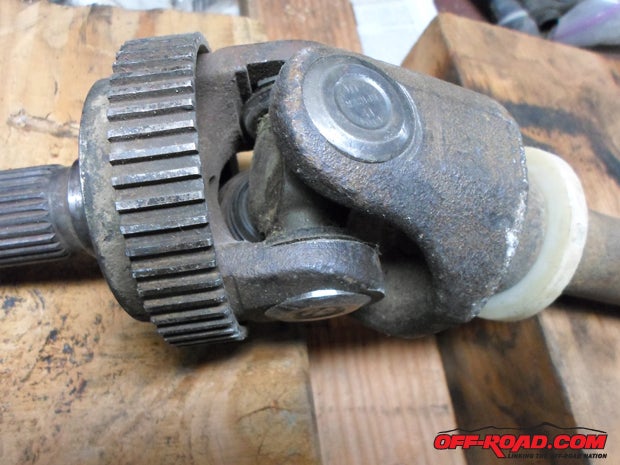
Use an old socket (spark plug socket is about right - this one is a bit bigger at 11/16) to drive the cap in on one side forcing the cap out the other side. This will damage the socket, which is why I recommend you use an old one. Remove the cap that comes out the far side of the yoke. If you can, work the other cap off on the inside of the journal. If not (which is common for me), drive it back out its original side. We are at that stage of driving the cap out the other side in this picture. Use pliers, if necessary, to grab the cap at this stage and pull it out.
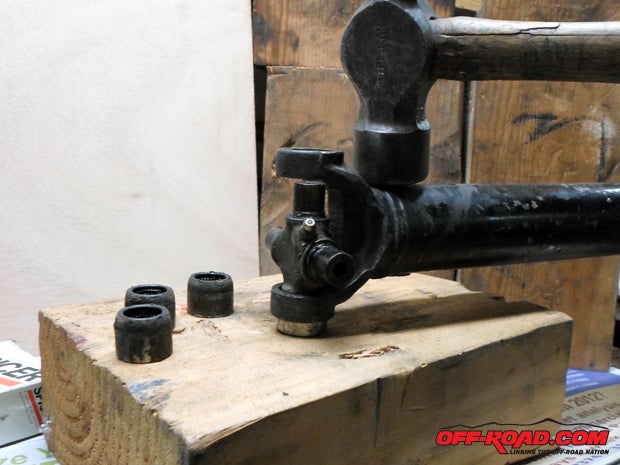
Set all the other new caps to the side to avoid spilling the needle bearings. Start the first cap from the bottom so you can keep it up right and not drop the needle bearings. Carefully insert the journal into the cap to ensure none of the needle bearings fall down into the bottom of the cap. Use a large hammer on the weld ring of the driveshaft to seat the cap. If even one needle bearing falls down into the bottom of the cap, it will prevent you from having enough clearance to seat the snap rings into their grove. If that happens (it has to just about everyone) you need to start over by driving out the caps again. Think of it as good practice!
Hold the journal so it stays in the first cap and turn the yoke over. Start the second cap from the bottom. Carefully lower the journal into it.
Use the hammer again to seat the second cap. Use the socket to tap them down until you can replace the snap rings on both ends. Make sure the snap rings fit fully into their grove.
Spend a few moments to make sure your vehicle is stocked with the appropriate tools and replacement parts. Those, along with the knowledge outlined here, will help you if you ever need to replace a universal joint.
Badlands Off-Road Adventure
Off-road trainer Tom Severin shares insight and tips on a variety of topics related to preparing you for that next off-road adventure. With over 40 years of off-road experience, Severin operates under his business Badlands Off-Road Adventures. He is a certified professional 4WD Trainer by the International 4-Wheel Drive Trainers Association and a Wilderness First Responder (WFR). He is a member of the California Association of Four Wheel Drive Clubs (CA4WDC), United Four Wheel Drive Associations and the BlueRibbon Coalition. He also is a certified UFWDA and a CA4WDC 4WD instructor.
For more information about Badlands Off-Road Adventures, visit 4x4training.com.
More Trail Tips Stories
What Causes Washboard Roads?
|
Off-Road.com Newsletter Join our Weekly Newsletter to get the latest off-road news, reviews, events, and alerts! |
Follow @Off-Road
 Your Privacy Choices